Friday, June 29, 2012

Altered Paper Bag Challenge

Today is the last day of YT Altered paper Bag Challenge which was created by Lydia (ItripledogdareU). Goodie for me this time...I finished mine and downloaded it right on time. Hopefully I can wine this one... after all it is my BD tomorrow...It would be such a wonderful gift!
But lets get to the project...
I needed to make a gift card for my friend and this challenge was just on time... So there it is...
Oh my my! I had so much fun working on that one... Easy, fun, interesting, inventing, etc... Love how it came out...
A a part of entry to this challenge we were suppose to make a video respond to Lydia's video, so it's all recorded and you'll be able to see it in real time at the end of this post...
Let me walk you through it...
This is closer look on details and embellishments upfront... Here you can see colored image of Thursday by The Greeting Farms with paper piecing technic and Copic markers coloring; as well as beautiful Prima Classic Roses; on the right you'll see layering of the papers, wich was created pockets, some embellishments like flat pearls and silver mesh; feathers and decorative punched tab are the tabs for pulling out tags.

Back of Altered PB project was decorated as well by layer of vintage polka dot distressed and torn paper. At the one of the openings you can see piece of lace sticking out through torn and rolled paper.
Wo-ho! to understand this collection here I would recomend to watch the video.... But still.. I tryed to put together pictures of tabs that I created and snicked into this project.. Here you can see front and back as well as location of 3 tags wich were created with Crown Spellbinders Die. Love that one allot!
And if three pockets with three tags on front of the paper bag wouldn't be enough, I created a secret slide out tag...
And I have no idea how and why I didn't shoot the picture of main pocket on top with note card inside.... The note card itself was made as envelope for a gift card.. Remember that it was a gift card after all..
So here you have it...my Altered Paper Bag for YT challenge and a gift card for my friend...


I hope you found it at list a little bit interesting...Thank you for following, watching and all this good stuff! For the supplies on this project please watch my YT video here...
Thank you so much for your time! have a wonderful day!
Hugs & Kisses, Natasha

Friday, June 22, 2012

Altered Shabby Chic Box for my BFF

Well hello everyone!
It's been a while right?...
I have been working on one project for my American Sister... I missed her BD in May - didn't call or send a card, because got seek... But at the end of the month I realized that I missed it...
So, I am trying to catch up...
She is so sweet and likes girly stuff, so I decided to altered the box I had for a while for her and give it to her as my gift...

That is how it looks on outside. Very girly and Parishion. Lots of Lace, pearls & flowers.
Yey, it wouldn't be me if this creation wouldn't have something interesting in it. The top of the box was recreated into easel card. Tulle and cute bow on the dress form just adding extra shic to it.
Oh yes, it has a pull out drawer... The glossy shimmer you see here is plastic cover that I stamped with staze-on inks...
Here we go...Now you can see the componants much batter... Clear plastic cover & envelope & some interesting stuff right there in the drawer...
Lets take our time and take closer look at each element... Envelope has a card, yes, very standart thought prosses... Another type og dress form... Inside card lots of stamping (do not like my hand writing)... banner with her name, words of congratulations, signature of friend & on the left side I created a slide pockets for two tags... Stamped those away from both sides.... (watch the part 4 video on all supplies I used for this project)... Lets see what was inside that drawer...

The cutest mini album with silver chain wraped around (she loves silver).. And it folds in 4 different diractions (see the video)
And of course it would be too simple to stop right there... This drawer has a second bottom... And under it there is gift for my American Sister: purchased chain and handmade charm...
Hope you enjoyed it!
You always can take a look at the video recording of this project on my YouTube channel (mynashka) or one of the 4 parts right here in this post...


Have a wonderful day!
Hugs & Kisses, Natasha

Monday, June 18, 2012

Wonderful BD card & video for WOC DT call

Hello my friends! As promissed I am here to share with you story & pictures of BD Card that I created for WOC DT challenge...
Here we go..

The card was made with paper towel roll, yes that long very not appiling  piece of paper roll...
I wraped it with plane printed paper, scored in half & deco cut edges... And after that stamped away with my fav 10 clear stamps set Nostalgia by Inkadinkado...
For a scored middle I cut out two stripes of white paper (roll length, any width for you) & punched decorative edges. Why two stipes? can you gues?...
Oh, you are such a Smartick;e! Goody for you! Yes, you are right - the second stripe was for inside... Before gluing both of them down I inked on the edges for a deco perpose...

This is left side... Because I have seam inside of the card I stamped larger area image with brown staze-on. I hade still unused area, so I glued the bow from vintage lace with my fav 450 Quick Dry Hellmar glue .
This is right side of the card... Here you see die cut mat with Spellbinders, stamped with two stamps from the set... Sicret to that oval stamping... If you were paying any attantion - I had two of those mats die cutted ( one for frond & secord for inside). So I fliped each mat upside down and place one on top of another leaving slight opening along the edge. So if you will pull out the front page mat on the back it will be stamped... I hope it makes sence... And to bring everithing together I used part of corner stamp to stamp the top of mat... The same tech was used on top of the pull out tags to cover the hole...
Talking about tags... That's how they look... I punched out the bottom corners with the corner punch, stamped large image and top of thr tag around hole. Back of the tag is empty shaier the top hole area, it is stamped the same way....

Well, I guess that's it for a Wonderful BD Card....
And here is promissed video. I hope you enjoyed this post and will take a minute to watch my video!


Have a wonderful day!
Hugs & Kisses, Natasha

Saturday, June 16, 2012

Wild Orchid Crafts DT call

Wild Orchid Crafts is UK webstore famouse by their gorgeous paper flowers, small embellishments etc. They announced a DT call for 4 openings... Because I just love their products I took my chance and created few things for them...
Unfrotunatly because bad timing (end of the school year for my son - exams, packing for summer trip) I couldn't make the project I had in mind...
So I collected some of my finished project, that you already have seen
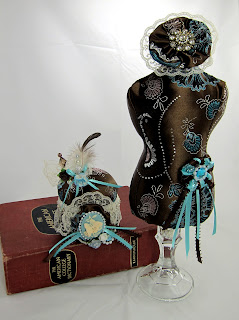
yes, that is my handmade dress form with pin cousion and few pins... Unfortunatly for WOC, but not for me, the Dress Form was sold at that time, so I just could show the pictures of it...
My name tag was entered to DT call in real deal time... As well as my Shabby Chic Easter cards...
But I had a chance to create couple more projects... Take a look..

Gorgeous Shabby Chic Stick Pins . That project was inspired by Fiona (jennings644 on YT).
And one more more into musculant style - at list I think so - vintage... Well you decide it for yourself...
Such a beautiful Birthday card... Let me surprise you on how it was made.... I will post it in the next post with more pictures and video on WOC DT call.. Ok?

Oh, yes! I wanted to mention something to you, my follower. I need to appologise for my english... Usualy I am taking time to do spell check on my posts through W, because mine spell check here on the blog always giving me a hard time. So it usually takes some time for me to upload a post because of that.. But because I am on vaction, and I really do not want to take so much time on spell check aspecially keeping in mind that I am already playing catch ups... So please bear with me!
Hugs, Natasha

Cards with Penny Black stamps from IPad

Here we go Ladies & Gets... My first brodcast from my IPad...
So far so good...Looks like totally the same as it would be my PC...
Here promised pictures of larger cards created with digitalized image of Penny Black stamps...
 Ooops! After hard trying I couldn't do that...


Here is video! Enjoy it!


Hope you like it! I think those just came out so nice!
Hugs & Kisses, Natasha

Friday, June 15, 2012

Cards, Cards & more Cards

Well, first part of June is gone already...
I  am on VACATION now at St. Louis, MO  in our summer residence...
Weather is gorgeous 80F, sunny, light brize...
Well first couple weeks were kind of crazy... Packing, planning, driving (travaling by car), unpacking, etc..
Now I can upload all my last projects that I finished already before all these craziness...
Here we go!
On our last crop I finished Easel BD card for my good friend Pam & gave it to her right in there. All her FAV colors: orange, green, pink
Here few more pictures...

I used Spellbinder for die cutting base of the card, mat & Magnolia Tilda image, as well as green oval. Tilda with flowers was colored with Copic markers. Love those stamps!!!
Flowers from my website Natasha'ScrapbooKorner.com: Fabulous Flowers & Prima Classic Flowers . Butterfly came from a Dollar Tree store (U have seen flowers and butterflies in my Wreath project).


For inside I used circle decorative Spellbinder die, I think CTMH stamp (not sure which set), WOC & Prima Classic Flowers.
Here is one more picture of the card/closed
Oh, papers My Mind's Eye 6*6 pack(do not have it with me to tell you collection). I used this paper on my name tag project for Vero 3 day Crop.

Ok that was one project.... But at the crop I started some of cards for my card stands for the summer...
They came out very, very nice!!! Take a look for yourself...


Base for the card were sets of 8 cards with envelopes from Michael's from a $1.00 bin. Images - digitalized Penny Black stamps. Mats - Spellbinders dies. Flowers I made myself - stay tunned for the tutorial upload on that (I was teaching class and have so many tutorials to download - Ladies were very pleased with my class).
Well I hope you like what I did here... I made few more cards with Penny Black stamps, but I think I took the picture of those on my IPad & so far didn't learn how to use that device to upload pictures on my blog... I'll try my best on that..
So far that's it... You can watch my YT video on these projects...


Well, I hope you like it! Leave me a comment or ask a question - I'll try my best to answer as soon as possible.
Hugs & Kisses, Natasha

Friday, June 1, 2012

Shabby Chic Tshirt Flowers

Guess what I have been up to?
I was making flowers from old T-shirts…
Yes, do not laugh. I will explain why and how I came up with this idea.
My son is growing like a mushroom…Sweet 16TEENssss…. I am trying to keep up & capture the most important moments in his life as much as I can…
So, his uniform, closing is not an exception. I can use anything!
I am collecting his T-shirts from the trips, camps, etc and cutting those into squares hoping that one day I will sew for his a quilt blanket using those. That should be something special…Do you agree?
Last night I was cutting stack of those T-shirts, putting it together by grade: 1st, 2nd… 7th, 8th. After finishing my planed project been very proud of myself I reached to all cut off pieces to throw those away and stopped… I sure can do something with those?!
Quick research on internet, and here we go…

Set of 6 Fabric Handmade Flowers - Brown Shabby Chic & Deep Green Shabby Chic
All of them are different in sizes & styles


Flower were die cut with Tim Holtz Alteration flower die using stretch cotton from T-shirts, polyester compressed material from flower wrapping, some tulle &yarn, plus buttons.


Colors


After I finished assembling my 1st set of flowers I made a kit of die cuts and did the video tutorial on USTREAM “Making TShirtFlowers”.

Thank you for visiting my blog! Please leave me a comment on how do you find my project.
Hugs, Natasha