
Here it is my first shadowbox… I can’t describe you, how proud and pleased I am with it, keeping in mind that I have 0 experiences in mixed media art.

I want to say special thank you to my girls – Barbara, Liz, Paula and Lisa who took their time and gave me some tips on how to start and what materials use in this project.
Putting together a life story in 12 windows is very challenging task.
Here is how I did it… http://youtu.be/H_BK7ZVwHWg?hd=1
P.S. I am always using the wrong name for the Clossy Accents, calling it Glaze. I did use Glossy Accents in this project.
I want to show you closer those elements I used.
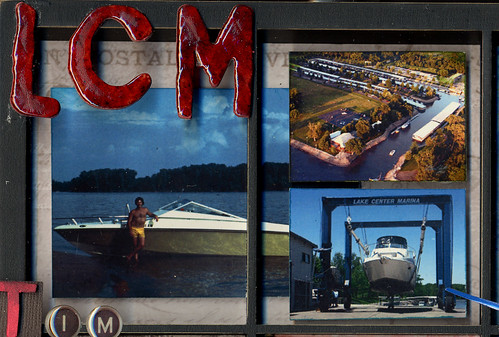
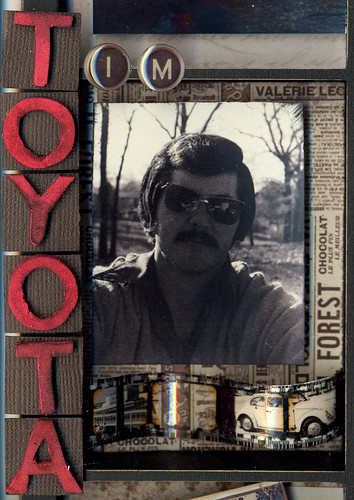
For the background I used Tim Holtz blue Post paper from his Vintage Shabby paper stash, next layer is done by cutting the picture in half and mounting it on the pop up dots, third layer of two smaller pictures on the right was created by doubling pop up dots, letters are grange board alphabet from Tim Holtz, inked with his distressed ink and finished with Glossy Accents.
All 3D embellishments: letters, charms, hinges, bottle, bullet, etc were glued with Glossy Accents…
Very interesting window – lots of ideas and techniques… The picture is on pop up dots, Tim Holtz Film Strip Ribbon glued with GA in three places (sides and middle to create a curve); mini pictures were sized down to the film opening and glued with GA from inside, and typesetting of letters on the left side was a brilliant Paula’s idea which came from one of the Tim Holtz tutorials (look for “Typesetting letters for my shadowbox” on YouTube by mynashka channel)
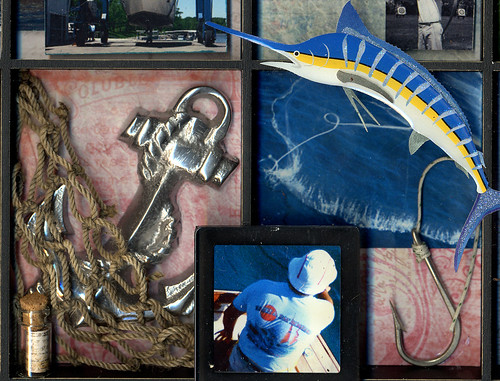
For these two windows I used pink vintage paper. At the left window I glued an anchor that I found at the sea food store, decorative net, mini bottle with a stripe of map paper inside. On the right side I cut out the net from printed picture and placed it right over background paper without any pop up dots to get dipper and father dimensional look. I had slide folder (the black frame around picture), so I cut picture of the fisherman to the size and using GA glued Tim Holtz clear square on top of the framed picture. To join both windows I mounted dried square picture on the border of the shadow box right in the middle. It just happened to bring those windows together visibly and give the depth and distance between man and net. The hook was last embellishment that I found in my husband’s fishing box. To block this theme from other windows I happened to buy a fish, which nicely feats the corner.

Pretty much the same techniques were used here. To join windows I split the target image and glued it the background paper highlight the hole in it with red stickles. Image of medal was done in the same manner as fisherman. For a bullet I asked someone who had it (hunters or you can find it at the gun show…think out of box). Diploma was printed as a mini and mounted on the double pop up dots. Picture on the right, and it’s done…
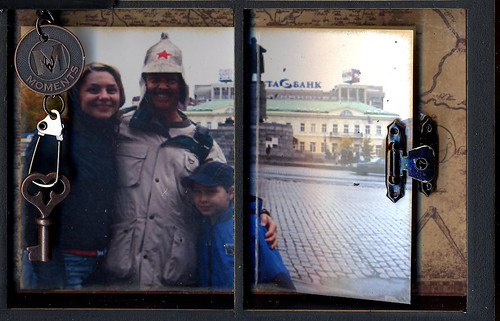
For a traveling I used map as a background, Tim Holtz swivel clasps and tokens. To create a door look I score the picture and glued the door hinge on it.

That’s a supply I used to create this shadowbox.
Thank you for login in! Nice creations to you!
No comments:
Post a Comment